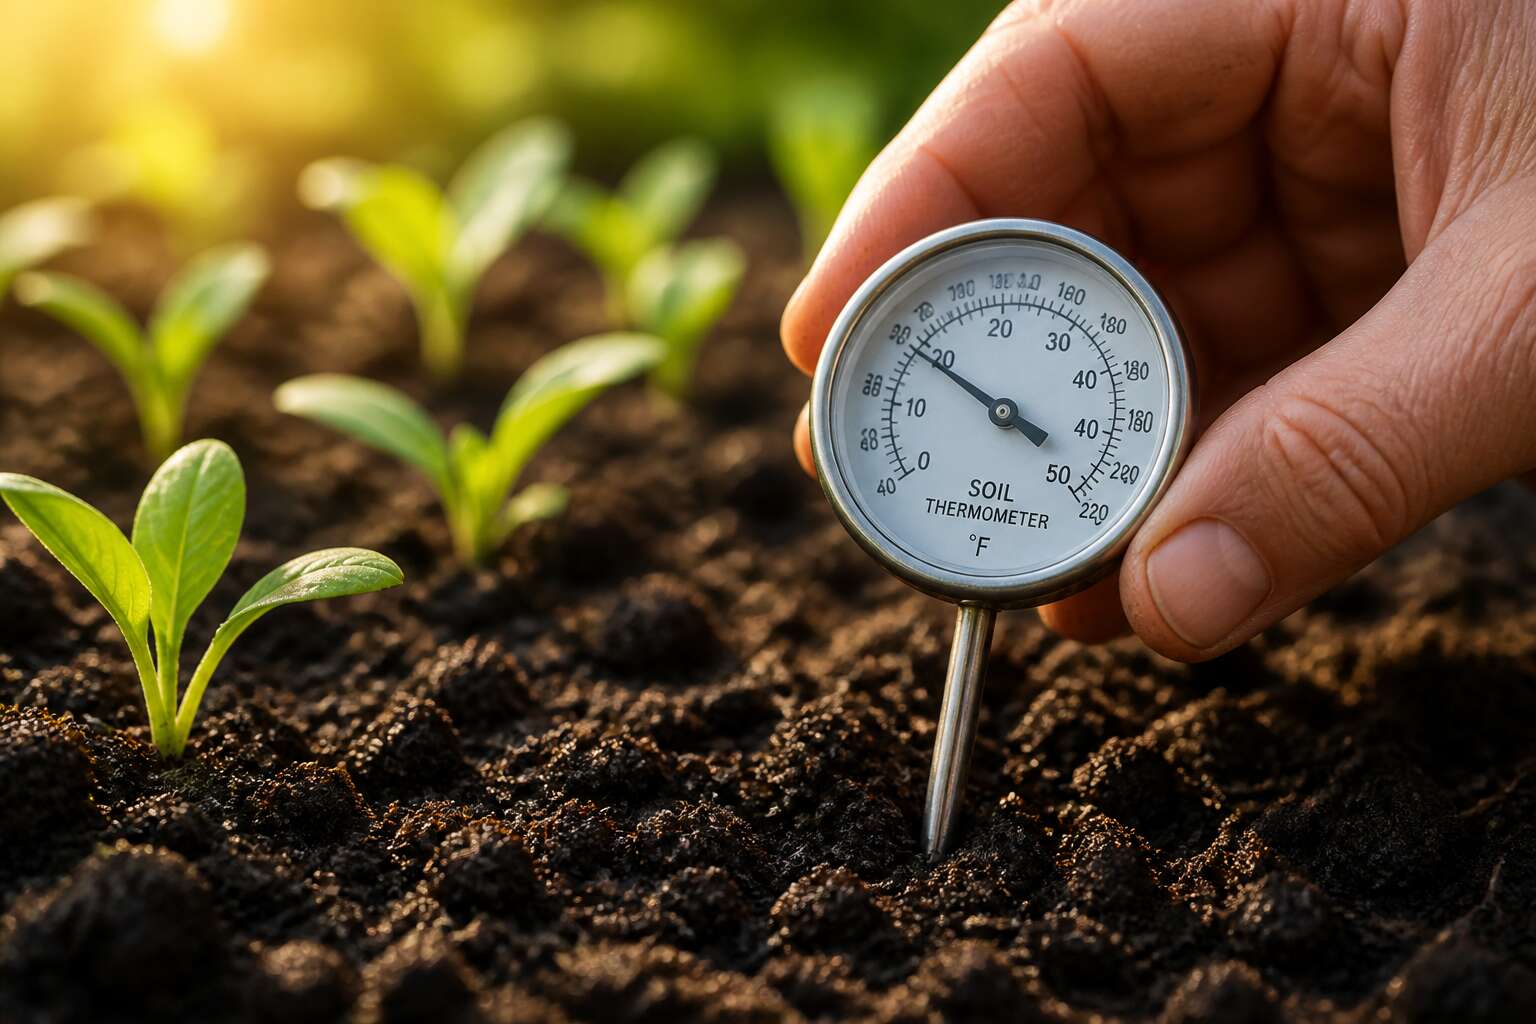
The Role of Soil Temperature in Gardening
Why Soil Temperature Matters for Plant Growth
In the dance of the garden, the soil is the floor, and temperature sets the rhythm. Many gardeners fixate on the air temperature, but the earth beneath our feet often tells a more honest story. It is the soil that dictates whether a seed decides to wake up and whether roots feel bold enough to push downward. Ignore the soil’s thermal cues and you risk planting into a silent bed where nothing stirs.
This is precisely why having accurate knowledge about soil thermometer use becomes an essential part of the gardener’s toolkit. You might assume that a warm, sunny day translates to a warm seedbed, but soil warms at a frustratingly slow pace. A specific reading prevents the heartbreak of sowing beans or maize into ground that is still too chilly for germination. Measuring the temperature at the root zone gives you the true signal, not an educated guess.
When the soil remains cold, several biological processes stall, creating a cascade of issues for your plants:
– Seeds absorb water but fail to sprout, leaving them vulnerable to rot and fungal diseases.
– Beneficial microbial activity slows considerably, reducing the availability of essential nutrients.
– Root systems remain stunted, so young plants cannot access moisture deeper in the profile.
– Growth hormones within the plant are suppressed, leading to chlorosis and weak stems.
During the South African summer, the shallow earth can become a scorching surface. Yet, a few centimetres down, the temperature might be perfectly moderate. This variance is the secret to successful succession planting. A quick check with a probe helps you find that sweet spot for crops like carrots or beetroot, which prefer a cooler foundation even when the air feels oppressive. The thermal memory of the soil, its capacity to absorb and hold heat, is the hidden factor that determines whether your garden thrives or merely survives the season.
How Soil Thermometers Measure Thermal Activity
A soil thermometer does more than register a number. It captures the thermal energy exchange happening beneath the surface, the interaction between solar radiation, soil moisture, and organic matter decomposition. The role of soil temperature in gardening extends well beyond germination timing, influencing water uptake efficiency and the rate at which nutrients become available to roots.
Soil thermometers measure thermal activity through a metal probe that conducts heat from the surrounding earth to a sensing element. The reading reflects conditions at the probe’s depth, not the surface. This distinction matters because surface readings can mislead. A probe placed at 5 to 10 centimetres reveals the actual root zone environment. Knowing about soil thermometer placement is critical for accurate data.
To build a reliable picture, consistency is needed:
- Measure at the same depth each session
- Record readings at the same time of day
- Check multiple spots across the bed
The thermal conductivity of soil varies with compaction and moisture content, which is another reason to depend on direct measurement rather than air temperature approximations.
The Direct Impact of Soil Warmth on Seed Germination
In South Africa, the difference between a failed seedbed and a thriving one often comes down to a few degrees of soil warmth. Many gardeners rely on air temperature, but the seed responds to the earth around it. A seed left in cold soil can rot before it ever breaks the surface.
The direct impact of soil warmth on seed germination is straightforward. Warmth triggers enzymes that convert stored starches into energy. Without that signal, the seed stays dormant. Different crops need different thresholds. For example:
- Beans germinate best when the soil sits above 15°C.
- Maize needs at least 18°C for reliable emergence.
- Tomatoes prefer a steady 20°C.
Knowing these numbers only helps if you measure accurately. That is what learning about soil thermometer use provides. Data, not guesses. Checking the actual conditions at seed depth removes the uncertainty.
Optimal Temperature Ranges for Common Crops
Soil temperature errors of 2°C are common in South African gardens, and they shift crop emergence by up to two weeks. The role of soil temperature in gardening includes nutrient availability, root respiration, and disease pressure. Cold soil suppresses phosphorus uptake, a cause of stunted growth. Warm soil accelerates microbial decomposition, releasing nitrogen near the roots.
Optimal ranges for common crops are specific:
- Beetroot: 10°C to 16°C
- Butternut: 20°C to 28°C
- Lettuce: 4°C to 15°C
These targets come from seed company trials, not tradition! To hit them, you need accurate data about soil thermometer readings at the root zone.
Exploring Different Soil Thermometer Designs
Analog Dial Soil Thermometers
Analog dial soil thermometers are a study in patience and permanence. I have watched gardeners in the Karoo trust a brass dial the way they trust a good handshake. There is no screen, no battery, no false precision. The bimetallic coil inside expands and contracts, moving a needle you must learn to read. That act of leaning in, squinting at the dial, creates an intimacy with the soil that a digital readout cannot offer.
The best designs use a sealed stainless steel stem and a glass face that resists condensation. Look for these details:
- A rust resistant stem that penetrates hard ground without bending
- A wide dial face with bold markings for low light conditions
- A calibration nut for rezeroing after years of use
Analog models respond slowly, but they reward you with steadiness. Here is what I have learned about soil thermometer construction: the analog form endures because it has no hidden failure points, a quiet virtue when the afternoon sun beats down on a North West field.
Digital Soil Thermometers with Instant Readouts
There is a moment in the spring, when the Highveld rains have just broken, where patience feels like a luxury. Digital soil thermometers with instant readouts were made for that exact moment. They strip away the guesswork, delivering a precise temperature the second you insert the stainless steel probe. I have found this immediacy invaluable when planting a second rotation of beans in the afternoon. The landscape of South African gardening is one of extremes, and the modern digital tools address that reality with aplomb.
The design is a marvel of practical engineering. A thermistor, housed within the tip of the probe, changes its electrical resistance with temperature shifts. This change is translated into a crisp number on an LCD screen. The best models offer a reading within ten seconds, allowing you to move from bed to bed with an efficiency that analog dials cannot match. When you are racing the shortening days of autumn in the Cape, that speed is a form of wisdom.
– An LCD display protected against moisture, crucial for the humid mornings in KwaZulu-Natal.
– A pointed, durable probe shaft that can pierce mulch and compacted clay soil.
– A memory function to record the highest and lowest readings of a stressful day.
Yet, a digital readout demands a certain reverence. The sensors are delicate. I have learned to push the probe in with a gentle twisting motion, avoiding any impact against stones, for the accuracy is tied to the physical integrity of the instrument. It is also a device that requires calibration. A simple ice water test should be your primary source of truth about soil thermometer function, ensuring the silicon heart within remains honest. Beyond the instant readout, these tools often include a soil moisture sensor, providing a dual perspective on the subterranean world.
The instrument changes how you think about your garden. Information arrives so quickly that you are compelled to measure more often, building a mental map of the microclimates on your property. This knowledge goes beyond a single temperature. It informs your strategy for watering and shading. While the instant readout seems to lack the ritual of the analog dial, it compensates with a sheer volume of data, a constant stream of insight that keeps you informed about soil thermometer variations across your entire plot. In the end, it is a tool for the gardener who wants answers, not just approximations. These digital companions offer a direct line to the ground beneath your feet, a connection that is as immediate as the numbers on their screens, yet as deep as the roots they serve.
Long-Stem Thermometers for Deep Soil Sampling
Long stem thermometers answer a different question than their instant read counterparts. Where digital probes excel at surface level checks, these extended instruments reach down 20 or even 30 centimeters to sample the soil where roots actually live. Deeper ground warms slowly here in South Africa, often lagging behind the surface by a meaningful margin. This delayed thermal response matters for perennial crops like fruit trees and vines. I have found that measuring at depth reveals a more stable temperature profile, one less influenced by the midday sun or a sudden Highveld thunderstorm. The reading offers a snapshot of genuine root zone conditions. Useful models include:
– A length marked at intervals for consistent placement
– A pointed tip that penetrates compacted earth with firm pressure
– A dial or digital face positioned comfortably above the soil line
Understanding the temperature variance between the surface and the root zone provides practical knowledge about soil thermometer behavior across different depths. This is particularly relevant when assessing whether the ground has truly warmed enough for deeper rooted transplants. The long stem design is a simple extension of a familiar tool, yet it transforms what you know.
Wireless and Smart Soil Thermometers
Wireless and smart soil thermometers change how we gather temperature data. These devices transmit readings to a phone or hub, so I can monitor conditions without walking to every bed. A sensor buried at root depth sends updates throughout the day. This helps in South Africa where afternoon heat can spike quickly while early mornings stay cool.
Some models offer:
- Multiple sensors for different zones
- Historical data logging for seasonal trends
- Alerts when temperatures cross critical thresholds
Battery life varies, but many units last months. The convenience of remote monitoring appeals to those managing large gardens. Knowing the facts about soil thermometer selection helps you pick a system that matches your setup.
Specialty Probes for Greenhouse and Raised Beds
Greenhouse growers in South Africa face a specific puzzle: soil temperature diverges sharply between a seedling tray and a deep border bed. Specialty probes answer this directly. Angled stems let you read the dial without crouching between rows, sparing your back during long inspections.
Raised beds demand shallow sensors. A standard 200 mm stem samples earth the roots never touch. A compact probe with 75 mm insertion depth reads the true root zone. Some designs include a flat surface plate that measures the temperature gradient from topsoil downward. These facts about soil thermometer choices matter when you grow in containers or elevated frames.
Match the probe to your structure:
- Right-angle probes for tight greenhouse corners
- Short-stem models for shallow raised beds
- Surface plates for seedling trays
Your knowledge about soil thermometer design translates directly into healthier crops and fewer surprises.
Step-by-Step Guide to Taking Accurate Soil Readings
Choosing the Right Location for Measurement
Soil temperature can swing by five degrees or more across a single garden bed under Highveld sun. One probe insertion near a brick path tells you little about the open soil thirty metres away. This variation explains why accurate data collection matters. When you seek solid information about soil thermometer accuracy, start with placement rather than equipment.
Choose a bare patch of earth away from structures, compost heaps, and buried stones. Insert the probe to a depth of at least ten centimetres, where root activity concentrates. Take three readings in a zigzag pattern across the bed and average them. Measure before midday, when soil has warmed steadily and evaporation has not yet cooled the surface.
– Pick a spot with consistent exposure to sun.
– Wait two hours after watering or fertilising.
– Check that the stem sits perpendicular to the ground.
This approach transforms raw numbers into a dependable reading and deepens your understanding about soil thermometer behaviour.
Correct Insertion Depth and Technique
Inserting a probe three centimetres deep gives you the temperature of the sun’s heat on the surface, not the soil where roots live. That shallow reading can mislead you by several degrees about soil thermometer accuracy. The probe must reach the root zone, ten to fifteen centimetres down, for a reading that matters!
Push the stem down with steady pressure. Twisting loosens soil around the shaft, creating an air gap that insulates the sensor. Air conducts heat poorly, so that gap falsifies your data. The stem should sit perpendicular to the ground, with the sensing tip fully buried.
Depth errors plague compacted Highveld clay beds and skew everything you learn about soil thermometer behaviour. Water the spot an hour before measuring to improve thermal contact and make insertion easier. Take the reading once the needle or display settles, which takes thirty seconds for digital units and longer for dial models.
Best Time of Day to Capture Reliable Data
The morning after a cold front has passed, a soil thermometer delivers its most honest narrative. Timing is not about convenience but consistency. Measure before the sun climbs too high, typically between six and nine in the morning, when the ground has settled from the night’s re-radiation. An afternoon reading captures the thermal lag of the topsoil, which can be several degrees warmer than the root zone. For a meaningful record of what seeds actually experience, morning data points are the most reproducible reference.
Consistency across readings is the real discipline. Mark your measurement spots or take several readings in a loose grid to capture spatial variation. The ritual of taking a reading is straightforward once you have the technique.
1. Clear away organic debris and any mulch from the surface.
2. Insert the stem to the proper root zone depth without twisting.
3. Pack the soil back around the stem to close the air gap.
4. Wait for the display to stabilise, then record the value.
Taking these steps each time reduces the noise from environmental variables. The goal is to observe the trend, not a single number. Accurate data about soil thermometer behaviour emerges from repetition performed at the same hour, under similar moisture conditions, day after day. That is the only way to distinguish genuine soil warming from the transient effect of a sunny afternoon.
Interpreting Temperature Data for Plant Health
Distinguishing Between Cold-Season and Warm-Season Crops
Let’s be honest, a number on a screen is just a number until you grasp its horticultural consequences. That reading from your about soil thermometer is a verdict on your future harvest. It tells you whether your garden is primed for a bounty or destined to produce a depressing collection of stunted vegetation. I have seen gardeners in the Highveld scratch their heads in March, wondering why their lettuce bolted, when a simple temperature check would have revealed the soil was still behaving like a summer inferno.
The distinction between cold-season and warm-season crops is not a suggestion, it is a biological rule. Your about soil thermometer readings dictate which vegetables will thrive and which will sulk. Cold-season crops, such as spinach and peas, prefer the earth to be between 5°C and 15°C. Warm-season crops, like tomatoes and peppers, demand a soil temperature above 18°C to even contemplate growing properly. Planting a pepper into the cold Karoo clay is a futile gesture.
Here is a rough guide to what your soil thermometer is trying to tell you:
– Soil below 10°C signals that warm-season crops will simply rot in the ground.
– Soil between 15°C and 20°C is the sweet spot for most leafy greens.
– Readings above 25°C mean you are in the danger zone for anything that dislikes heat stress.
Do not expect a carrot to care about your planting schedule. It cares only about the thermal reality of the soil. If you are relying on the calendar instead of the probe, you are gambling with your food supply. The data is right there, waiting to be read. Ignoring it is a choice, albeit a poor one.
How Soil Temperature Affects Root Development
A reading from your about soil thermometer reveals more than surface warmth; it predicts how aggressively roots will explore the earth. Roots behave like cautious surveyors. They refuse to expand into chilly zones. When the probe shows a stubborn 6°C, expect root systems to remain shallow and pathetic. At 15°C, they branch out with enthusiasm. At 28°C, they stop foraging and start conserving energy.
- Below 8°C: root growth nearly halts.
- Between 12°C and 18°C: roots spread and anchor well.
- Above 25°C: roots turn woody and less efficient.
Interpreting these numbers correctly helps you avoid overwatering, since dormant roots cannot drink much. A quick check of your about soil thermometer before planting saves you from nurturing a root system that never materialises.
Recognizing Signs of Overly Cool or Overheated Soil
A stubborn reading on your about soil thermometer often arrives before visible damage. Cool soil below 10°C makes leaves take on a dull purple tinge, especially on tomatoes and maize. Overly warm soil above 30°C produces a dry surface crust that repels water. Both conditions stress roots differently.
- Pale, brittle roots signal cold stress.
- Cracked, hard soil surface indicates heat stress.
- Wilting despite moist soil points to root damage from extreme temperatures.
A single measurement at the surface misleads. Insert the probe at root depth and compare readings across the morning. The soil’s thermal memory, not the air temperature, dictates whether plants thrive or stall.
Adjusting Planting Schedules Based on Thermal Readings
A single morning’s reading tells you little. Track the trend across three days. When the soil holds steady at 14°C for two consecutive mornings, the thermal signal is real. That consistency matters more than any single spike!
For South African gardeners, this changes the calendar. A maize crop planted when the soil sits at 12°C will sulk for weeks. Wait until the probe shows 16°C and the same seed overtakes the earlier planting within a month. Your observations about soil thermometer trends guide that decision.
- Cool soils delay emergence unevenly, creating patchy stands.
- Warm soils speed germination but can dry the seedbed.
Interpreting the numbers means matching your crop’s thermal window. If the reading climbs past 20°C in early spring, shift warm-season crops forward. If it drops back, hold off. The soil tells you when to act.
Using Temperature to Diagnose Soil-Borne Issues
At 10°C, Pythium spores wait. At 16°C, they attack. The difference between a healthy stand and a collapsed one often comes down to a few degrees of soil warmth. South African growers who only use their soil thermometer as a planting cue miss this diagnostic function entirely.
When your notes about soil thermometer data show erratic swings across a single bed, I trace the issue to uneven organic matter decomposition. Hot pockets near the surface suggest active microbial activity, while cold zones indicate anaerobic pockets. This is where knowledge about soil thermometer patterns becomes a diagnostic tool rather than a calendar aid.
Consider what the numbers expose:
- Consistently low readings after rain signal waterlogging
- Rapid temperature drops at depth suggest groundwater intrusion
- Stable warmth with poor plant vigour points to nematode damage
Each pattern corresponds to a distinct subsurface condition.
Companion Planting Strategies with Temperature Awareness
The soil beneath a maturing pumpkin vine can run 4°C warmer than bare ground a metre away. In South African market gardens, this microclimate shapes how companion plants perform. Knowledge about soil thermometer readings moves beyond single crop decisions and into the choreography of companion planting.
When the midday reading at 10 cm depth holds near 14°C, the bed favours brassicas and their companions. At 18°C, the same bed tilts toward legumes and aromatic herbs. I have watched a Cape Flats bed where basil stalled until the soil climbed past 17°C, and growers who keep precise notes about soil thermometer trends pair plants that reach peak activity in the same thermal window.
- Plant shallow rooted lettuce beside deeper rooted carrots; the lettuce cools the surface while carrots draw warmth from below.
- Place heat loving basil near tomatoes only after the soil thermometer holds steady above 16°C.
The numbers reveal which alliances will thrive and which will merely coexist!
Maintenance and Calibration for Long-Term Accuracy
Cleaning and Proper Storage Practices
Your soil thermometer can be a fickle beast if you treat it like a garden trowel. Leaving it buried in the dirt for weeks on end invites corrosion and throws off the delicate mechanics inside. You wouldn’t leave a fine watch in a mud puddle, so afford your probe the same basic respect. A quick wipe after each use prevents caked-on soil from acting like an insulator, which can skew readings by a degree or two. For the most accurate data about soil thermometer care, remember that soil residue holds moisture and can rust the stem over time.
Calibration is your secret weapon against slow drift in accuracy. Most analog dials can be gently adjusted with a small wrench, while digital units often have a reset function. A simple test involves mixing clean water with ice to create a 0°C slush. Insert the probe, wait a minute, and see if it matches. If it does not, adjust the nut until the needle sits squarely on the freezing mark. This quick check is especially vital in South Africa where intense sun can bake plastic housings and warp components.
Proper storage extends the life of your instrument significantly. Keep the device in a dry, shaded spot away from direct sunlight and chemical fertilizers. Here is a quick routine to maintain peak performance:
– Remove batteries from digital models during long off-seasons.
– Clean the stem with rubbing alcohol to kill pathogens.
– Check the probe tip for bending or cracks before each season.
Skipping these steps leads to erratic readings that will have you planting tomatoes in a cold snap or tilling soil that is still too frigid. A well-maintained tool costs you ten minutes a month, but a neglected one costs you an entire harvest. Treat it well, and it will give you more than just numbers, it will give you confidence. The best knowledge about soil thermometer longevity comes from consistent, simple habits rather than expensive replacements.
Checking Calibration Against Known Reference Points
A probe that misses the mark by three degrees turns a cold snap into a whisper. I’ve learned that trust in a number requires stepping beyond physical storage. The fundamental test for any device, from a cheap dial to a smart sensor, is the ice bath. This is the only guaranteed zero-degree environment, provided the ice is crushed and the water is pure. But altitude complicates your boiling reference. At Pretoria’s elevation, water boils around 95 degrees Celsius, not 100. A simple adjustment for this local reality keeps the upper range honest.
Here are the constants I rely on:
- Ice water for the freezing point.
- A digital comparator for the ambient average.
The durable wisdom about soil thermometer reference checks is that validation is cheap, but corruption is silent.
Replacing Batteries in Digital Models
A digital screen that never lies is a comfort, but only when the power source is honest. The most accurate temperature probe in the world becomes a decorative stick when the battery sags. I have seen units drift by nearly two degrees as the voltage drops, which is enough to turn a precise planting decision into a guess. Most digital models will show a low battery icon, but the degradation begins long before that warning appears.
Pay attention to the response time of your instrument. A sluggish readout that takes twenty seconds to settle often signals a weakening cell, not a failing sensor. Replacing the battery at the start of each growing season is a small ritual that prevents silent corruption of your data in the field.
– Remove the battery after extended storage, especially during wet winter months.
– Inspect the contacts for corrosion or moisture, cleaning them with a dry cloth if needed.
– Store the unit without the battery installed to protect the internal circuitry from leakage.
For growers who rely on a wireless probe, the transmitter is the first to suffer. A weak signal or frequent disconnects point directly to the power supply. The better you know your digital companion, the less likely it is to betray you on a critical morning. A clean, fresh battery keeps the readings about soil thermometer accuracy honest from the first probe to the last.
Protecting Probes from Physical Damage
Steel shafts on long stem thermometers bend with surprising ease. A careless lean against a tool crate points the tip off axis, altering readings about soil thermometer accuracy. The sensor inside is a thin wire soldered to a terminal that tolerates little abuse.
Dropping a unit onto compacted ground is common in South African market gardens. The impact rarely cracks the housing, but it deforms the probe tip or loosens an internal connection. The drift becomes visible only when readings no longer match a trusted reference.
- Torsional stress from twisting the probe in hard soil
- Bending force on the shaft during deep insertion
- Impact trauma from tools placed on a probe left in the ground
Seals around the display face and stem joint are equally fragile. A tiny fissure lets moisture corrode components before the user notices condensation. Practical knowledge about soil thermometer handling, not sophisticated electronics, decides whether a probe survives decades or fails in one season.


0 Comments